
Joining Benchtops The Right Way
Homeowners used to prefer stone or wood benchtops because of their visual appeal. However, recent advances in design sensibility have allowed concrete to be regarded as a viable alternative. Concrete kitchen benchtops are now a typical feature in modern homes.
Concrete offers kitchen countertops a more modern and sleek appearance. It also makes surfaces more durable and easier to maintain than other materials. Concrete benchtops are typically more resistant to heat and stains. The following are things to note as you join benchtops.
Precautions When Joining Benchtops
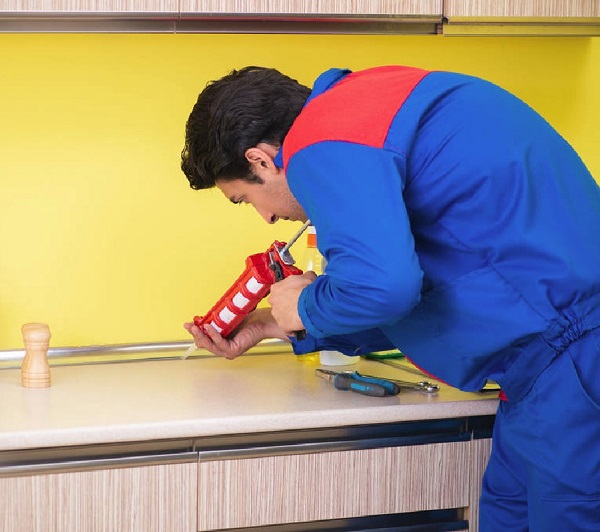
• You MUST hire an expert installer to install the benchtops.
• Never carry your benchtop flat; instead, carry it on the edge.
• Take your time installing. To attain a professional finish, take your time and be careful during installation.
• Avoid scratching your tabletop by avoiding using any metal equipment on it when installing.
• You must never insert screws directly into the benchtop.
• Do not use the brackets that came with your base cabinets to attach benchtops to base cabinets. For this, use a silicone adhesive.
Tools And Materials When Joining Benchtops
The following are the materials and tools you will need when adhering surface benchtops to your base cabinets.
• Tape measure
• Spirit level
• Silicone gun
• Methylated spirits and clean cloth
• Silicone glue
• Straight edge
• Packers or wedges
Gather the materials below when you install appliances alongside benchtops.
• Pencil and square
• Jigsaw (used for cutting template board material)
• Router (1800-2300 watts/2.5-3hp)
• 3M double-sided tape as appropriate
• Template board material JOINING
• Power/cordless drill
• Allen key
• Sanding block
• Methylated spirits
• Vacuum cleaner
• Face mask
• Safety glasses

How To Make Cooktop And Sink Cut-Outs
Make and cut out templates
One of the most crucial components to successfully completing a cut-out in your custom benchtop is using an appropriate template.
• Make careful to utilise the paper templates provided by the appliance maker to trace around the template board.
• Make the cut-out on the template board using a jigsaw.
• Sand the material for the template board as smooth and precisely formed as you can.
• Gently place the template in the precise location where the cut-out is needed, then clamp it in place.
Use a router when cutting holes in custom benchtops
Make sure the benchtop is adequately supported before you start routing the cut-out. In particular, ensure the benchtop’s waste area is supported at all times.
Note: Your benchtop will become damaged if the waste section of the cut-out is not adequately supported. Also, the cut-out in the custom material should not be made using a jigsaw or hole saw.
• When the template board is securely fastened, insert the profile router included in your install kit into the cut-out.
• The route around the template from left to right to complete the cut-out, using the template board as a guide.
• Next, sand the inside edge of the cut-out to get rid of the cutting marks with 150 grit sandpaper.
• Sand the cut-top and bottom edges to a radius of about 2 mm to remove any sharp edges. You can use block and sandpaper with a 150-grit rating for this. If you don’t do this correctly, your benchtop may eventually develop fine cracks.
• Apply the aluminium heat conductive tape around the cut-out in one continuous piece exclusively for cooktop cut-outs. Ensuring that the benchtop is shielded from excessive heat is a crucial step.
• Ensure the aluminium heat tape reaches the outer border of the cooktop flange and continues past the cut-out edge of the benchtop.
Use blocks when fixing sinks and appliances
Before any benchtops are joined or put into place, all sink and appliance fixing blocks must be bonded. Ensure no screws are inserted directly into the custom benchtops when installing a sink or appliance.
All fasteners must be inserted into the benchtop’s wood subframe. In some installation scenarios, it could be necessary to glue extra fastening blocks to the underside of the benchtops.
Install a sink undermount (if required)
Note that before installing the benchtop onto the wall cabinets, you will need to position and secure the sink beneath the benchtop if you choose to undermount your sink.
• The subsequent steps will help you get the best results when mounting your sink.
• Make sure you follow the installation instructions provided by your sink manufacturer to get the most significant results.
• Make sure you identify the precise location where your sink has to be cut out.
• After the hole has been made, use 150 grit sandpaper to smooth off the inside edge of the cut-out, making sure to get rid of all cutting marks.
• Sand the cut-top out and bottom edges to a radius of about 2 mm to remove any sharp edges. If you don’t do this correctly, your benchtop may eventually develop fine cracks.
• Flip the counter over and mark the locations of any additional fixing blocks.
• Clear the area around the cut
• Tighten the screws holding the sink to the wooden subframe and any mounting blocks. As directed by the manufacturer, wipe away any excess silicone that has seeped around the edge.
• Flip the benchtop over to install the entire benchtop after the completed sink. Placing the sink beneath the counter requires applying a silicone bead to the sink cut-out underside.
Make Laminate Benchtop Joints With Mason’s Mitre
Mason’s mitre is a beautiful technique to finish off cleanly and guarantee a clean join between cut laminate worktops in any kind of kitchen design. The most exhilarating moment of the planning process is picking out a kitchen countertop. Considering that benchtops are the workhorse of any kitchen, choosing the best joint is one of the more crucial choices to be made.
Laminate benchtops are reliable and inexpensive
Laminate is a relatively inexpensive benchtop material that is also very reliable for many years. Today’s laminate table top manufacturers provide a far wider variety of colours, and some stone-effect laminate benchtops may pass for the real thing. Long-lasting properties of laminate benchtops include waterproofness, impact resistance, high degrees of scratch resistance, and stain resistance.
Why do I need mason mitres for this design?
A mason’s mitre is a specific kind of benchtop joint. Although it has historically been used in masonry, contractors now rely on this technique to join kitchen benchtops. The two joined parts come together in a mason’s mitre, as if in a butt joint, but only a little portion of the front is mitred.
This ensures that the benchtop profile, such as the tight form benchtops, is correctly done. Mason mitres also result in substantially less waste than ordinary mitre joints, which require triangular portions to be cut off the ends of both joint elements to provide the appearance of a full mitre junction.
Professional Benchtop Installation For Your Kitchen
If you want a new benchtop installed in your kitchen, you should reach out to professionals who are experienced in benchtop installation and can answer any questions about benchtops that you may have. After all, installing a kitchen benchtop is not an easy do-it-yourself task. You may lack the skills and tools needed to complete the job successfully.

